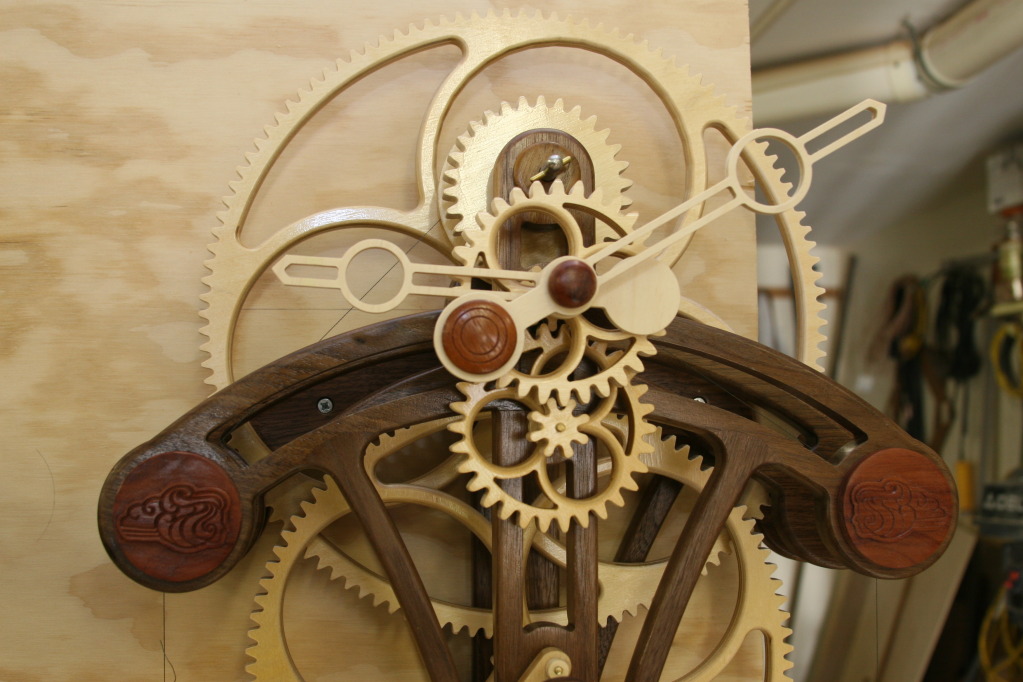
10/12/11

Putting Your New Clock into Beat: Serkan Yaliz's Simplicity

Simplicity by Serkan YALIZ

Serkan writes:   "Aloha Clayton,

Hello fron Ankara-Turkey. We had purchased the plans nearly a year ago.
"She" is ticking finally :)

And keeping the time with an error of +1 min per hour. I can tune her up if you have any suggestions.

Looking forward to purchasing new plans from you.   Have a great day.

Serkan YALIZ"

Clayton writes:  "Aloha Serkan, nice to hear back from you.  Thanks for the pix.  It is always nice to see a new clock being put into beat.  They are such wonderful mechanisms, and it looks like yours turned out beautifully.  Your wheels look so clean and crisp!  Nice craftsmanship.

You don't say if she is running fast or slow each hour, but right now it does not matter because during the first four to six weeks it is best just to let them run,and then after that time, after they have 'broken in', make changes.  Some clocks just naturally run fast or slow for a few weeks and then get into their natural beat.

I would guess from seeing your craftsmanship that your clock is running fast.  After the break in period if she is still running fast you can; add more bob weight, lengthen the pendulum shaft, and/or decrease the drive weight.  But a fast running clock is only a testiment to your craftsmanship because it tells me that there is very little internal friction.

If your clock is running still running slowly after six weeks it is a simple matter of shortening the pendulum shaft by 1/2" (12mm) at a time and retest.  Your bob should be in mid position on the threaded rod when you retest.  That way you'll have plenty of adjustment room, up or down, to get your clock into perfect beat. 

Perfect beat for a pendulum clock is about one minute error per day, but remember that will change as the weather changes.

Thanks for the beautiful pictures of your clock that is so happily ticking away over there in Turkey.

Enjoy.

Aloha.  Clayton"

10/6/11

Number Six by Keith Thomas

Number Six by Keith Thomas


Keith writes:  "Dr. Boyer,
I have just finished my #6. I started with all baltic birch but thought it was too "white" so remade the frame out of zebra wood, looks alot better I think.
I just got plans for your Wee Willie clock and noticed your email on the plans so thought I would drop you a line. It looks like it will take a while to make but will be enjoyable. I enclosed a few pics, one is a wood Harley I did a few years ago.
Harley by Keith Thomas (this plan not sold or designed by Clayton Boyer)

I will send pics of my Willie clock when completed. Thanks for the plans, it is an enjoyable hobby.


Keith Thomas"

Clayton responds:  "Keith, I really enjoy seeing the personal touches woodworkers put into their projects. Your Fleur-de-lis hands and beaded dial ring blend nicely with your zebra wood frame.
I was actually glad to see you went with the lighter in weight copper hands on your finished Number Six clock. The wooden ones may have been too heavy with all their "Fleur" out to one side. Imbalanced hands can be difficult for a clock to lift after they leave the six o'clock position. Going with the lighter copper hands was a brilliant move, and they look very nice with your wood choices, too.
I can see with all the woodwork you have on your walls why you didn't want the "white" look of the Baltic birch ply frame for your Number Six. The zebra wood fits nicely into your home. I won't be showing your Six pix to my Number Six though...she'll get jealous and be wanting a new frame.
The Wee Willie really is a fun, and pretty easy build. It is a small clock and accuracy in drilling and cutting is extremely important. I don't usually build more than one of any design, but we liked the WW so much that I built a second one and am presently designing a weight driven, wall hung version.
Very nice to hear you are enjoying this wonderful hobby, and your work really does these designs proud. Thanks for the great pix.
Amazing detail in your Harley sculpture. Congratulations.
Enjoy. Aloha. Clayton"

10/5/11

We Haven't Talked About Those Evil Bushings for a While

Email dialog between Clockbuilder Gene (black print) and Clayton (red print):

Clock builder Gene writes:
"I will admit, I have about come to the end of my rope.  At one point I have had my clocks (2) run for up to 48 hours, non-stop. At that point they were running fast, so I thought I would lengthen the shafts by two inches. So, I cut 2 inches off of the 36.25” and added 4” to the middle of the shaft using a lighter colored wood for contrast. When I tried to restart the clocks neither would run for more than an hour. I have tried every think I can think of to get them to run smoothly again. I’ve polished everything that I can get to hold still.  I have even tried to add brass tubing to the ends of the arbors to act as a bearing. If I turn the wheels by hand they seem smooth as silk. But when I add the escapement and weights and try to start them they will stall after a while. It seems like there is not enough force to turn the escape wheel to the next spook. I tried adding more weight to the Weights. With little or no change.  I tried adding heavier string and more of it to fill the take up spool. Nope…………. No good….. no help.
Question: Do you think that it may have been a mistake to put the brass tubing on the ends of the arbors?
Thank in advance for the help………………………. If you have any extra straw laying around may I borrow some…………….. because I have been grabbing at all the straw that is around here.
Wish I had a video camera.
Gene"

"Aloha Gene,

The answer to your question is:  OMG YES! Any sag of the frame whatsoever will bind the arbors with brass inserts. I think you may have found your problem.

In my very first clocks I put brass bushings - big mistake. Now I NEVER put in brass except possibly at the weight end (but don't even consider using them there either).
When I went to the NAWCC Museum and Library in Columbia PA I saw a 300 year old clock still in running condition that used only metal arbors on wood plates. After 300 years you might want to consider bushing, but I doubt it.

Clayton"

"Thanks Clayton. I thought that the brass bushing with oil would solve some of my problems. But after studying the workings for the last week, the bushing were the only thing I could think off that I might change. Guess I’ll go back, fill the holes and re-drill them. What do you thing would be best to use, water base or oil base filler?


The clocks look nice but if they won’t run for more than 10 minutes, I will never be happy with them. My oldest daughter, Stephanie, tried to make me feel better by saying she didn’t care if it runs or not she just thinks it will look nice to have on her wall. She knows I’m a stickler for detail. And before I will let them leave my shop, they will be right."


"To correct my beginner's error in my first clocks, I went back and pounded in wood dowels with wood glue, and re-drilled. Tricky, but it can be done, and I think you'll be a lot happier with their performance. Drill slowly, in and out, with a Brad point bit because this time you'll be drilling with the grain instead of across it...unless you make plugs! 

"You may be right about the plugs. They would be good and tight and not need much glue. I could make 3/8”plugs using a plug cutter from the same wood as the frame and I think the arbors would be happier in the cross grain. And plug from both sides, where needed. If this works I’ll let you. My wife will tell you that I threatened to burn down my shop with the clocks in it. But now maybe I can wait a week or two."

And later Gene writes:


"Many thanks for your help. You were right about the brass bushings. I plugged the holes with 3/8” walnut plugs and re-drilled then to 9/64” & 13/64”.


I think part of the problem was caused because when I cut these holes on my CNC I was having some feed rate problems with it and the holes were not perfect in size. This time I drilled them using a brad point bit that I had ordered from the internet. I only have to make 6 small shaft caps and I’ll be sending these to their new homes. The shop will seem like something is missing when they go. But off to a new project, Riding my Honda Gold Wing to Montana and Glacier National Park in June.


P.S. I think I have solved the problems with my CNC, the last time I used it ran perfectly.


Thanks again for the plans & the help.


I’ll be BACK


Gene"

8/26/11

Unexpected Blog Break

...due to Lisa's computer crashing!  Sorry...I will get back to you as soon as HP sends my computer back to me.  I'm glad my computer was still under waranty!  I'm also glad I had my hard drive backed up in two places and I didn't lose any of those beautiful pictures and emails that you so kindly sent to us.  Hope to be back soon.

Aloha, Lisa

8/18/11

The Space Time Continuum Kinetic Sculpture is Here!

Space Time Continuum Kinetic Sculpture by Clayton Boyer

Its beautiful Zen-like motion is shown below:

Details, descriptions, and ordering info for the STC are now available at http://www.lisaboyer.com/

8/16/11

Simplicity by Rick Broby

 Simplicity by Rick Broby
Rick emails: "Hi Clayton,

Well here is my finished Simplicity. I made it for my sister who lives in Canada, I used Cherry and Maple wood and made the bob to look like a Canadian maple leaf. Her cabinets are cherry with stainless appliances so I bought a stainless grab bar from Home Depot (the kind you find in the handicapped bathrooms) I cut it in pieces and used it for the weights.
 
 I also made the corner frame supports a little fancier with some fret work.   (Click picture to enlarge and show detail)  It ended up being a lot more work but she was happy with it and it was fun to make.
 
Well I'm not sure which pattern I will tackle next but thanks for this one.

Rick Broby"

Clayton answers:  "And, you cut fancy hands and scrollsawed all those numbers! Beautiful.

It is easy to see that you are an excellent and accomplished scrollsawer. The beautiful scroll work you did on the supports, hands, bob, and dial really set your clock apart.

Thanks for the pix. Your Simplicity turned out both beautiful, and uniquely your own...and it's always nice to hear your sister appreciated your efforts.

Aloha. Clayton"

8/13/11

Toucan by Zach Woods, Age 13


Zach Woods (Age 13!) emails:  "Dear Dr. Boyer, I am pleased to send you these two pictures of the Toucan clock my I just completed with some occasional help from my dad. I am 13 years old and a middle school student in Wichita, Kansas.

I was really inspired by your wooden clock designs and felt I just had to make one or two of them. This one is for my dad's office (if my mom lets him take it out of the house!) and I'm also making a Simplicity design with my Grandpa. Me and my dad are plannning to build many more clocks, like Solaris for my mom and others for my dad's friends.

Thank you for making such cool clock designs, everybody that sees them are very impressed.

Zach Woods"

Clayton answers:  "Thank you for your kind words about my designs, and thank you also for the pictures, Zach. I am very impressed.

You did a wonderful job on your Toucan. I'm also glad to hear you let your dad help a little. I love hearing stories like yours where the family works together to build these wonderful projects. I live in my own Norman Rockwell world in my head, and hearing stories like yours brings me a lot of joy, and wonderful memories of building projects with my own son. Great times.

I hope that you and your grandfather enjoy building the Simplicity, too. You have chosen two very different mechanisms, so you are really getting a great education in wooden clock building, and I am sure your father and grandfather appreciate you letting them be a part of that joy.

Thank you again for the pictures. When my webmaster gets back from vacation we will be posting them to my Flickr' link.

Enjoy the Simplicity build and I'll be looking forward to pictures of that one, too.

Great job on your Toucan!

Aloha. Clayton"