Showing posts with label Bushings. Show all posts

2/27/16

Frame Types and Tube Bushings


Jim emails:  "I was looking at the arbors plans for the Deco and it appears that the Wheels are a tight fit on the arbors and the arbors spin within holes drilled in the frame - is this correct?
When I built the Simplicity (still ticking, btw) some of the wheels had a tube pressed in them and that assembly spun freely on its arbor.
If I am correct about the Deco Arbors, why did you go from the tube/arbor combination to a press fit with the arbors spinning in the frame holes?  Doesn't this make the front/back frame alignment critical?  Is friction an issue?"
Thanks, Jim

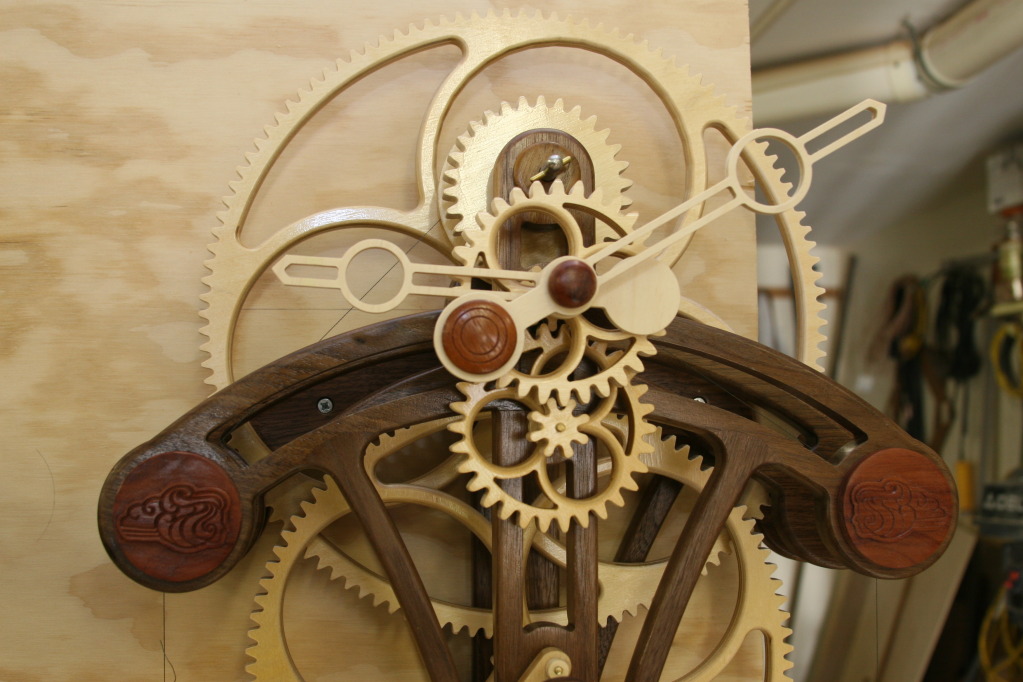
Clayton:  There are basically two type of clocks that I design; plate clocks (by far the most common kind of clock) and uniframe clocks.  Genesis is a true uniframe.  ALL of the wheels of the Genesis turn on stationary arbors that are pressed into the frame:
Genesis by Clayton Boyer
Deco is a true plate clock where all of the arbors turn in the plates (frames):
Deco Built by Bob Brown
 Simplicity is a combination of these two basic clock building methods:
Simplicity by Clayton Boyer

Tubes seem to turn freely on there rods on uniframe clocks, but they do not turn as freely as simple wood hole on metal arbors.  I did the experiment with the Genesis.  One Genesis I built with tube inserts (as with the Simplicity) and on the other Genesis I just drilled the hole in the wheel and set it on the arbor.  The latter took significantly less drive weight to run the clock.  If I were ever to redesign the Simplicity I would totally eliminate the brass tubes, except for spacers and where the crutch/pallet arbor goes through the frame.  A tube is needed there for alignment.  The same is true in the Toucan.

DO NOT use brass tubes for bushings in a two plate clock.  You can read LOTS about this in my blog.  Just click on the huge word "bushings" in the right hand column.  Brass bushings are one of the two fastest ways to turn your kinetic sculpture into a still-life (the other is getting finish on the tooth surfaces).

Whenever I mount the front and back plates of a two plate clock, during the alignment process I insert rods in all of the arbor holes.  And I keep twisting them to make sure that the alignment is correct as the frames are glued and screwed in place.  Fortunately if they are not exactly aligned a simple, very slight "reaming" with a hand drill to remove the friction will solve any binding problems (but I hope that won't be necessary).

Yes, friction is always an issue in any clockworks, no matter what kind.  And the more arbors your clock design has, the more wheel sets your clock design has, the more friction is created.  Check out my Radiance one wheel clock and see how little drive weight is required to run a single wheel clock:
Radiance by Clayton Boyer
 

Enjoy! Clayton

12/15/12

And a Story of Woe and Joy after Applying Finish...

Simplicity by Dave Beran

Clayton,

After a month of my Simplicity faithfully tick/tocking in my work shop I decided to dress her up a bit and move her into the house. So I disassembled her and did some staining and finishing of all the non-moving parts. Upon re-assembly, nothing. Raised the weight to a full 7 pounds, nothing. Now how often has friction been mentioned in your comments and on the blog? So apart she came. I'd discovered a tiny amount of finish on the brass arbors. So I polished up the arbors, spun pipe cleaners in all the brass tubes and turned drill bits, by hand, in all other holes. Upon reassembly she came alive. My Simplicity is now running on 3lbs with a 4oz counter weight. And after a few days of adjustment I have her dialed in to about a minute or two per day. By the way, the hands, dial, and weight shells are walnut. It was was recycled from pallet planks found while helping a friend boil maple syrup last spring.

Thanks for the new hobby, now on to the Flying Pendulum gizmo.
 
Dave Beran
Duluth, MN
 
Aloha Dave, unfortunately yours is too common a tale. It really is amazing how little finish it takes to get these kinetic sculptures to become a "still life". There are two things that will bring these wonders to a dead stop faster than anything and those are 1) finish, and 2) bushings. Fortunately, both are avoidable!...well, bad craftsmanship has to be in there somewhere, too, but that sometimes can be overcome by reading and following the recommendations in my FAQ's.
 
It's good to hear you got your finish problem solved and she's up and running again. And, congratulations, by the way, on your amazing craftsmanship. Not only is she a beauty, but you got her running on less than three pounds.
 
That's actually the weight she's supposed to be able to run with, but since Simplicity is a beginner's clock, I bumped up the initial weight recommendation because I wanted everyone, no matter how bad their craftsmanship, to be able to hear their clock tick. Your craftsmanship, on the other hand, is superlative.
 
Congratulations, and I know you are gonna love that Flying Pendulum design, too. I keep mine just above my Mystery Box. Both are guaranteed to bring a smile to the face of whom ever views them.
 
Enjoy.
 
Aloha. Clayton
 

10/5/11

We Haven't Talked About Those Evil Bushings for a While

Email dialog between Clockbuilder Gene (black print) and Clayton (red print):

Clock builder Gene writes:
"I will admit, I have about come to the end of my rope.  At one point I have had my clocks (2) run for up to 48 hours, non-stop. At that point they were running fast, so I thought I would lengthen the shafts by two inches. So, I cut 2 inches off of the 36.25” and added 4” to the middle of the shaft using a lighter colored wood for contrast. When I tried to restart the clocks neither would run for more than an hour. I have tried every think I can think of to get them to run smoothly again. I’ve polished everything that I can get to hold still.  I have even tried to add brass tubing to the ends of the arbors to act as a bearing. If I turn the wheels by hand they seem smooth as silk. But when I add the escapement and weights and try to start them they will stall after a while. It seems like there is not enough force to turn the escape wheel to the next spook. I tried adding more weight to the Weights. With little or no change.  I tried adding heavier string and more of it to fill the take up spool. Nope…………. No good….. no help.
Question: Do you think that it may have been a mistake to put the brass tubing on the ends of the arbors?
Thank in advance for the help………………………. If you have any extra straw laying around may I borrow some…………….. because I have been grabbing at all the straw that is around here.
Wish I had a video camera.
Gene"

"Aloha Gene,

The answer to your question is:  OMG YES! Any sag of the frame whatsoever will bind the arbors with brass inserts. I think you may have found your problem.

In my very first clocks I put brass bushings - big mistake. Now I NEVER put in brass except possibly at the weight end (but don't even consider using them there either).
When I went to the NAWCC Museum and Library in Columbia PA I saw a 300 year old clock still in running condition that used only metal arbors on wood plates. After 300 years you might want to consider bushing, but I doubt it.

Clayton"

"Thanks Clayton. I thought that the brass bushing with oil would solve some of my problems. But after studying the workings for the last week, the bushing were the only thing I could think off that I might change. Guess I’ll go back, fill the holes and re-drill them. What do you thing would be best to use, water base or oil base filler?


The clocks look nice but if they won’t run for more than 10 minutes, I will never be happy with them. My oldest daughter, Stephanie, tried to make me feel better by saying she didn’t care if it runs or not she just thinks it will look nice to have on her wall. She knows I’m a stickler for detail. And before I will let them leave my shop, they will be right."


"To correct my beginner's error in my first clocks, I went back and pounded in wood dowels with wood glue, and re-drilled. Tricky, but it can be done, and I think you'll be a lot happier with their performance. Drill slowly, in and out, with a Brad point bit because this time you'll be drilling with the grain instead of across it...unless you make plugs! 

"You may be right about the plugs. They would be good and tight and not need much glue. I could make 3/8”plugs using a plug cutter from the same wood as the frame and I think the arbors would be happier in the cross grain. And plug from both sides, where needed. If this works I’ll let you. My wife will tell you that I threatened to burn down my shop with the clocks in it. But now maybe I can wait a week or two."

And later Gene writes:


"Many thanks for your help. You were right about the brass bushings. I plugged the holes with 3/8” walnut plugs and re-drilled then to 9/64” & 13/64”.


I think part of the problem was caused because when I cut these holes on my CNC I was having some feed rate problems with it and the holes were not perfect in size. This time I drilled them using a brad point bit that I had ordered from the internet. I only have to make 6 small shaft caps and I’ll be sending these to their new homes. The shop will seem like something is missing when they go. But off to a new project, Riding my Honda Gold Wing to Montana and Glacier National Park in June.


P.S. I think I have solved the problems with my CNC, the last time I used it ran perfectly.


Thanks again for the plans & the help.


I’ll be BACK


Gene"

6/10/11

Toucan by Tim Wilson


Toucan (with added seconds hand!) by Tim Wilson

Tim writes: "Hi Clayton, I finally finished the Toucan. It was a very enjoyable project.   I enjoyed the experimentation (about a week) as we discussed about adding the second hand, it was just a little bit challenging to do some of the modifications that had to be done, but that is what makes this wonderful art of building wood gear clocks enjoyable, frustrating at times, but enjoyable, if that makes sense. Even though the second hand is not outside the hour and minute hand as conventional clocks, I think it turned out pretty good, and who's to say that what we do with wood gear clocks has to be the conventional way of clock designs and the way we build them anyway!! I have included a picture and a link of the clock in action. (Tim's YouTube video shown below:)


I commend you on your plans, very accurate and clear instructions. I got a chance to go thru your site, very informative, especially the blog, the information you give will be very helpful for some of your first time builders. I especially found it interesting about builders wanting to use bushings--glad you are advising them properly, I was a victim of the bushing monster myself at one time and you are dead on with this subject.

I will look forward to building another one of your clocks in the near future; I want to concentrate for a while on my Westminster project. Thanks for sharing Your Great Talent in clock designs and building techniques with the wood gear clock building world...it is very gracious of you.

Have a wonderful and blessed day.

Tim Wilson

P. S THE TOUCAN HAS BEEN RUNNING FOR ABOUT A WEEK AND IS A VERY ACCURATE TIMEPIECE"

Tim, that's spectacular! Your interpretation of the Toucan is absolutely wonderful. You are exactly why I ask for pictures. I love seeing the creativity of other woodworkers, and you not only did a great job of building the Toucan, but have actually improved upon the design with the addition of a seconds hand.

I basically consider myself a 'prototyper'. I'll get an idea that I want to play with, and I figure that if I want to play with it, others would like to play with it too. Most of the really good stuff in my designs actually comes from a collaborative effort with other wonderful builders like Jeff, Adrian, Forrest, John, Bob and Marc...and now YOU!

As you may know, it was Jeff, the electronics genius, that really made the Toucan idea happen, and the concept was proofed by Adrian, and Forrest who both made their own versions of this fun design, and showed that the design was possible to recreate.

I am very happy to hear you found my plans clear and easy to work from. Enjoyment and personal fulfillment is what this hobby is all about, and accurate plans help decrease the frustration level a lot. Thank you for your kind comments.

Your Toucan turned out beautifully, and congratulations on your brilliant addition of a seconds hand. I am impressed and elated by you creativity.

Enjoy.

Aloha. Clayton

6/2/11

Marble Strike by Art Dimock


Marble Strike by Art Dimock (Click on picture to enlarge)

Art writes, "Dr. Boyer,

The Marble Strike Clock -- What can I say? Certainly not as pure as the #6 and nor as graceful as the Inclination, but a unique Rube Goldberg in disguise.

A little more challenging than my previous clocks but still a pleasure to build.  The greatest challenge was finding twelve marbles that were nearly identical in size and roundness. After much sorting and sizing everything seems to operate reasonably well.

Another challenge is the humidity. The northeast U.S. seems like a rain forest this year and I have decided to wait for drier conditions to make any final adjustments.  If I decide to make any more clocks I think it would be a good idea to insert brass tubing in the frame arbor holes to hopefully reduce friction and humidity problems.

Thanks again for professional grade plans.

Art Dimock"
Absolutely glorious! Your Marble Strike is a true beauty, Art.

You've added a lot of very nice touches, like the all wood counterweight, and I see you went with John's acrylic dial ring, and Landon's speed trap. Your woodworking skills are wonderfully displayed.

Beautiful work.

Yes, finding twelve marbles that are exactly the same is a lot more difficult than one would think.
However, about your brass bushing comment...you haven't been reading my blog, have you!?!? There's a ink to it on my mainpage (but I'll give you a hint... NO BUSHINGS!!!)

I don't know what it is right now with guys wanting to put in bushings, but I've recently gotten a rash of emails from guys wanting to add bushings. I've explained in my blog all about how bushings actually INCREASE internal friction. I'm glad you mentioned it before actually doing it.

Thanks for the wonderful picture. I love your interpretation of the Marble Strike.

Enjoy.

Aloha. Clayton

5/14/11

Mystery Box Update

Remember Ken from the post on 5/10?  Here's an update on his internal friction problem:

Ken writes:  "I didn't know about your blog until you pointed it out to me.. Thank you.
 
I polished all the axles and the lantern gear pins at the places that rubbed. Before I polished them, I got 29 revolutions of gear S3, and I just came in from counting 79 revolutions of S3. POLISHING WORKS!!!
 
I noticed you put my note and your response in your blog, too. I think that's a wonderful idea, because we can all learn from each other's questions, as well as both positive and negative experiences.
 
Good work.
 
Ken"
 
Yes, polishing the arbors does work...but, hey! now yours works better than mine!

5/10/11

Internal Friction, Bushings...and Crayons!

Bushings, revisited.  Can brass bushings help with internal friction problems?  This information below pertains not just to the Mystery Box, but to all of my clock plans as well:

Builder Ken writes:

"Good morning.  After recovering from a back injury that delayed work on my Mystery Box, I just finished assembling the gear train. I think it has a lot of friction in it and was wondering if it would be a good idea to put brass sleeves over the axles, eliminating the wood-on-brass rubbing. I also wondered if painting the faces of the gears with melted candle wax would help.

On the other hand, gear S3 turns about 30 times on one winding so I may be worried about nothing.  Any opinions would be appreciated. 

Ken" 

Clayton answers:  "Aloha Ken, Yes, you have a bit too much internal friction in your Mystery Box train. My S3, which is the wheel that drives the Mystery Arm, will return the Lever Arm to the locked position 49 times on a full wind. You might be able to decrease the internal friction by doing a little 'coloring'. A color coordinated Crayon works well to reach in between the tooth surfaces, and is less clogging than candle wax. 

The spring for the Mystery Box is powerful enough to overcome a lot of internal friction, but adding paraffin to the mating surfaces of the teeth can only help as long as not too much is used. Too much paraffin can clog the dedendums (troughs) between the teeth.

Read over the section on "Depthing" in my FAQ's. That depthing process will help with any internal friction problems you may have in any wooden gear project. 

I don't know why it is such a common misconception that brass bushings decrease internal friction. If they did, my designs would have them. 

Brass bushings actually INCREASE internal friction. Read over my blog. I have blogged on just this topic and give some measurements you might find interesting. 

If the mechanism has a very solid frame, such as is in the Mystery Box, one would probably notice little difference with the bushings. However, if there is any sag in a clock frame that has bushings, the internal friction between the arbor and the bushing becomes too great, and the clearances so small that nearly any amount of sag will cause the clock to stop. There's no 'wiggle' room for the arbors running inside bushings.

I did an experiment with my Genesis, which is a Uniframe clock. The wheels of a uniframe clock run on arbors protruding from the back frame. There is no front frame, so frame sag is not an issue.  I made one Genesis with brass bushings inside each of the wheels, and one Genesis with no bushings in the wheels, only holes drilled in the wooden centers of each wheel. The difference was dramatic in the amount of drive weight required. Even eliminating the "sag factor" the bushed wheeled Genesis clock took more drive weight to run it!

Also when you have metal bushings on metal arbors, lubrication is required. NO LUBE is required with metal on wood, although you can safely add a little paraffin into the arbor holes. 

My Number Six has been running daily, faithfully, without a single problem, and without lubrication of any kind (because it has no bushings!) for almost nine years. 

Let me know how the color coordinated Crayon trick works for improving the number of turns you get from your S3.

Aloha. Clayton"

5/9/11

Tempo by Miles Hatem, Questions and Answers

Miles writes:

"Hello Clayton,

I'm finally getting toward the end of building my Tempo (which I bought plans for over 6 months ago, wow didn't realize how long it's been until I actually counted back). But as I noticed on your recent blog, you were talking about not putting bushings on wheels because you design some holes to be specifically oversized.

Along that note, when I was putting arbors into my frame for the first time I noticed that the center wheel arbor (3/16") was loose in the frame. I figured I had messed up and drilled the wrong hole size, but when I went back to check the pattern it specified a 13/64 hole. It didn't make sense to me that the center wheel arbor would be loose, so I drilled the hole larger, plugged it with a dowel, then re-drilled with a 3/16" hole.

Now I'm starting to question if that was the right thing to do. Is the center wheel arbor supposed to be loose in the frame?

I look forward to sharing pictures of the finished product. It's definitely been the most fun woodworking project I've done.

-Miles Hatem"

Clayton answers:

"Glad you read my new blog. Yup, the drill sizes shown are correct. Go ahead and re-drill to the correct size.
Send pix when you get your Tempo completed. I always enjoy seeing the creativity of other woodworkers.
Bob, one of my builder/proofers, just loves his Tempo. He says it's the best design of mine that he's ever built. I hope you feel the same way.
Enjoy.
Aloha. Clayton
PS. I don't think you'll find any mistakes on the plans I sent you. You can build it as shown, and guess what?...it'll run! Yay!"

Miles writes back (and a new Tempo is born!):

"I've finally finished the build!


I decided to make the entire pendulum (actually almost the whole clock for that matter) out of a single 96"x11"x3/4" piece of maple. And since I had one large piece of stock, I took a bit of liberty with the pendulum and made the transitions a bit more flowing. Luckily I had the forethought to add some length to the bottom to account for the extra weight at the top. And, since I had the blended transitions in the pendulum, I went ahead and redesigned the hands to match.


I've had it running for a few minutes at a time, but have some minor stopping issues related to a very slightly bent escape wheel arbor (hoped I could get away with it, but apparently I can't). Also, my counterweight is a bit on the light side (~3lb). I only have it filled with steel BB's, so I'll have to try and find someplace here in California that sells lead. It runs fine if I double the weight even with the bent arbor, so hopefully if I fix both issues it won't give me any trouble at all.


The next design of yours I'm looking forward to building is the Medieval Calendar Clock, though I think I'm going a bit crazy for thinking I can do it. I guess if you throw enough time and frustration at anything you should be able to achieve your goal, right? Anyways, I probably won't get around to starting it for another few months, since I plan on building myself a desk first. So I'll have to get back to you when I'm about ready to start so I can buy the plans.

Thanks for offering these beautiful designs for others to build. I have thoroughly enjoyed building this, and am sure you have heard the same from many, many others.

-Miles"

Thank you, Miles, for sharing pictures of your beautiful work, as well as notes and questions from your journey along the way.

Note:  Miles sent me a video of his wonderful Tempo in action, but I was unable to download it.  So here's Bob Brown's Tempo in motion instead:


4/4/11

True Confessions from an Experienced Clockster, Part One


Bob has come up with some great tips and some confessions of his blunders and how he fixed them in this great email.  My responses are in red.

Hi Clayton,

I liked your blog. I'll have to check in from time to time. I think the stick on numbers might do the trick. I do like the wood burned ones as well so maybe I'll have to practice. Aloha Bob, you are right about the numbers on the Genesis. I knew my artistic abilities were not up to the task of hand lettering them on the wheels, so I made 'shields' with the numbers, just like on my Horologium. I think that they look better on the Horologium, too. I do make the numbers available in dxf format if guys want to CNC their numbers into their wheels. Wood burning looks great, but then you are back to that artistic limitation that I possess. A professional did the wood burning that you see in those pix.

I learned something from your blog. I built Balance with solid wheels (laminated) and I think I committed the sin you spoke of in the blog. I think I sleeved the wheels.....and did I mention she is having trouble staying running? I'll work on fixing that situation.  On the blog post of 3/30, I was referring only to the folly of adding bushings to the frame. I have been guilty of the same lapse in judgment. In my early clocks I added a few brass bushings. Those are the clocks that now take the most maintenance. Since it is metal on metal, some lubrication is required a couple times a year, and lubrication takes up dust which means the clock has to be cleaned often - and I don't like cleaning clocks. I like designing and building them! My Six, without bushings, has been running faithfully daily for almost nine years without a single problem and never a cleaning. My bushed clocks, however, are constantly needing something.


Balance by Clayton Boyer

3/30/11

Letter from Clockster: Bushings and Brass Inserts

Builders wanting to "improve" upon my designs end up with clocks that do not run.  Here is the most common example:

Clock builder:  "I pressed 1/4" long brass tubes into the front and rear frames...."

My response:  NOOOOOOOOOOO!!!!!!!!!!!!!!!!! This is SUCH a common problem.  Guys think that they can "improve" upon my designs by putting bushings in their frames.  This is THE most common reason for a clock NOT running.  By putting in bushings the builder has decreased all of the 'wiggle room' that I designed into the clock to keep it running for decades.  A slight sag in the frame and the clock STOPS!  And what happens when your clock stops?  Your add more weight which sags the frame even further.
 
My Number Six has been running for almost nine years without a single problem - ever!  The brass tubes are great for spacers, but should not be used in the frame.  Why?  We'll take a common tube that I use a lot for spacers, the 5/32 brass tube that fits perfectly over a 1/8" rod.  The hole I design for that 1/8 arbor rod to run in the frame is 9/64 giving a tolerance of 0.016" 'wiggle room'. 
 
The 5/32 brass tube, on the other hand has an inside diameter of 0.128" for that same 0.125" (1/8") rod, giving us a tolerance of 0.003!!!!!!!!!!!! instead of 0.016".  This will ASSURE that your clock will eventually soon stop.  DO NOT USE BRASS INSERTS IN ARBOR HOLES, unless, of course, you like watching a stopped clock.

Clock builder continues:  "...for 0.187" dia, SS rods... and instead of spacers, just used more brass tubes over the rods and press fit the wheels, pinions, pallets, etc. on them.  Probably overkill, and the next one I build will use the same SS rods, but no "tube bearings" in the frames to see what happens."

My response:  I can pretty much tell you right now what will happen.  With the superior craftsmanship that you have put into the rest of your clock, it will run happily for many decades.