Showing posts with label Simplicity. Show all posts

2/27/16

Frame Types and Tube Bushings


Jim emails:  "I was looking at the arbors plans for the Deco and it appears that the Wheels are a tight fit on the arbors and the arbors spin within holes drilled in the frame - is this correct?
When I built the Simplicity (still ticking, btw) some of the wheels had a tube pressed in them and that assembly spun freely on its arbor.
If I am correct about the Deco Arbors, why did you go from the tube/arbor combination to a press fit with the arbors spinning in the frame holes?  Doesn't this make the front/back frame alignment critical?  Is friction an issue?"
Thanks, Jim

Clayton:  There are basically two type of clocks that I design; plate clocks (by far the most common kind of clock) and uniframe clocks.  Genesis is a true uniframe.  ALL of the wheels of the Genesis turn on stationary arbors that are pressed into the frame:
Genesis by Clayton Boyer
Deco is a true plate clock where all of the arbors turn in the plates (frames):
Deco Built by Bob Brown
 Simplicity is a combination of these two basic clock building methods:
Simplicity by Clayton Boyer

Tubes seem to turn freely on there rods on uniframe clocks, but they do not turn as freely as simple wood hole on metal arbors.  I did the experiment with the Genesis.  One Genesis I built with tube inserts (as with the Simplicity) and on the other Genesis I just drilled the hole in the wheel and set it on the arbor.  The latter took significantly less drive weight to run the clock.  If I were ever to redesign the Simplicity I would totally eliminate the brass tubes, except for spacers and where the crutch/pallet arbor goes through the frame.  A tube is needed there for alignment.  The same is true in the Toucan.

DO NOT use brass tubes for bushings in a two plate clock.  You can read LOTS about this in my blog.  Just click on the huge word "bushings" in the right hand column.  Brass bushings are one of the two fastest ways to turn your kinetic sculpture into a still-life (the other is getting finish on the tooth surfaces).

Whenever I mount the front and back plates of a two plate clock, during the alignment process I insert rods in all of the arbor holes.  And I keep twisting them to make sure that the alignment is correct as the frames are glued and screwed in place.  Fortunately if they are not exactly aligned a simple, very slight "reaming" with a hand drill to remove the friction will solve any binding problems (but I hope that won't be necessary).

Yes, friction is always an issue in any clockworks, no matter what kind.  And the more arbors your clock design has, the more wheel sets your clock design has, the more friction is created.  Check out my Radiance one wheel clock and see how little drive weight is required to run a single wheel clock:
Radiance by Clayton Boyer
 

Enjoy! Clayton

3/17/15

Ken Duffy's Magical Collection of Ticking and Movement

Toucan, Harmonic Oscillator, Flying Pendulum by Ken Duffy
Talented woodworker Ken Duffy sent us these wonderful pictures of his home filled with Clayton Boyer clock and kinetic sculpture designs built by Ken.
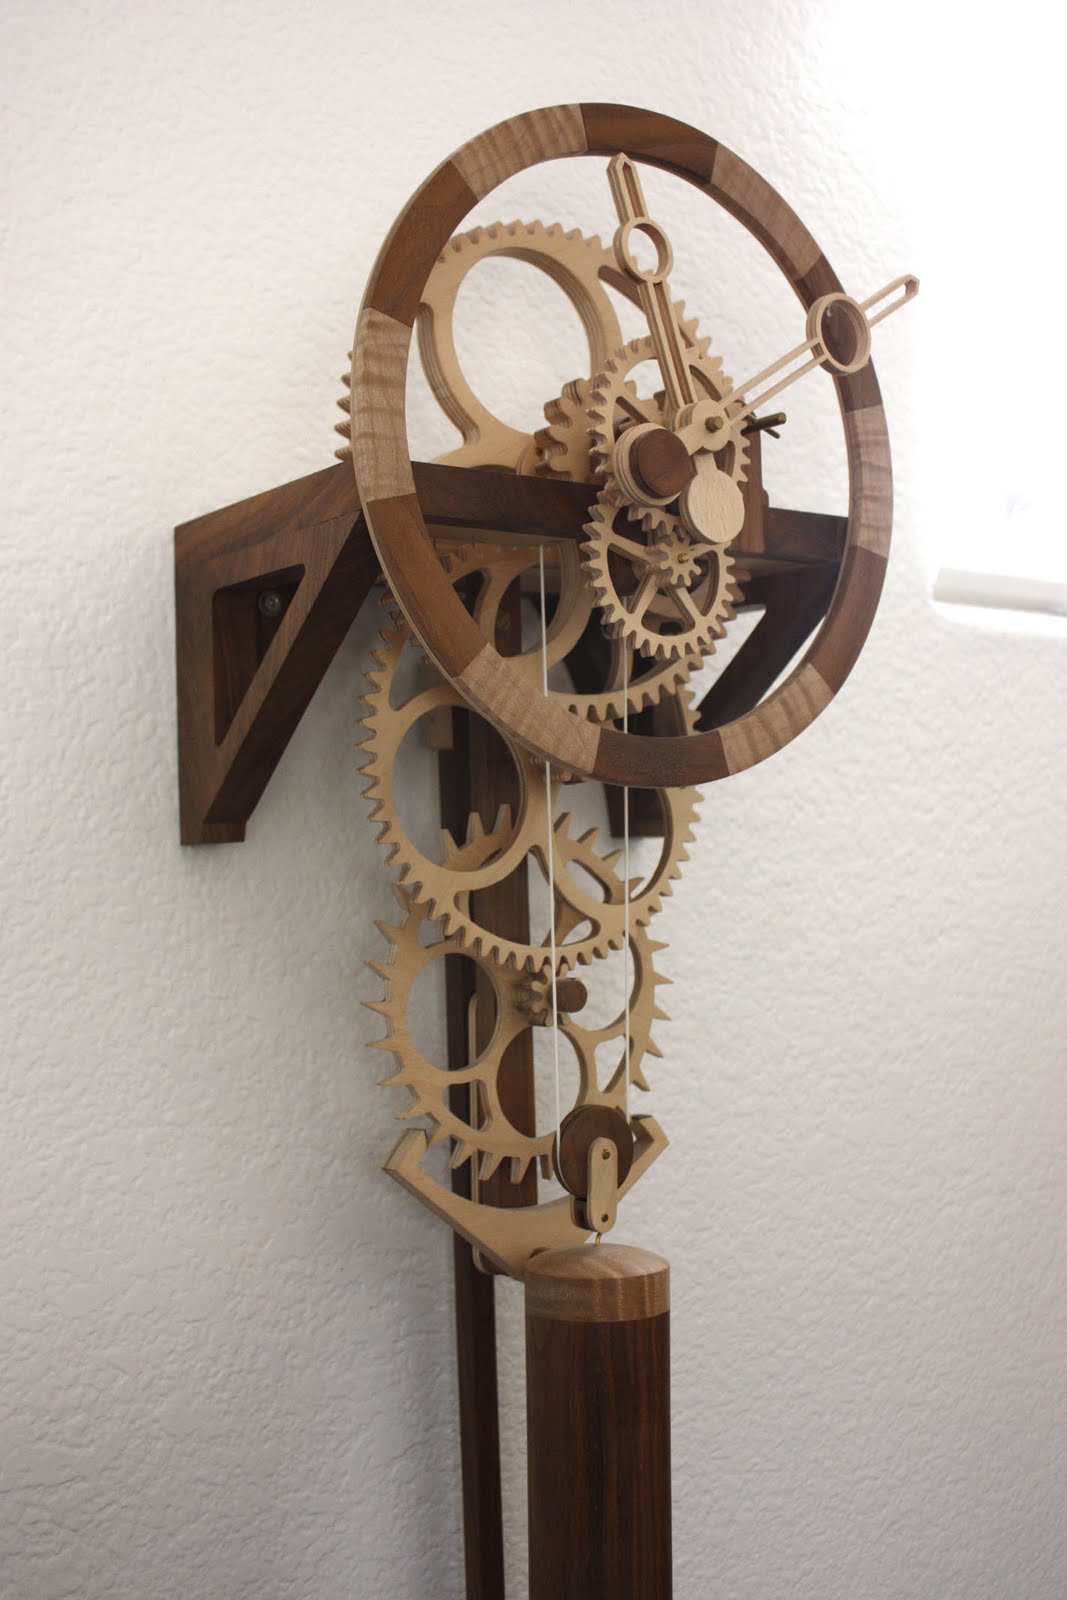
Balance, Zinnia, Bird of Paradise, and Simplicity by Ken Duffy
All the ticking and motion must be wonderful!
Another Simplicity, and another shot of Balance.
I am also happy to report that Ken is currently working on yet another Boyer design, the Deco Clock.  Thanks for being such a great customer, Ken, and thank you so much for sharing your pictures.  We can't wait to see your Deco when it's completed.

10/5/14

Simplicity by Rodney Kueffer

 Here is some unique builder creativity that you simply have to see...

Simplicity Variation by Rodney Kueffer

Simplicity Variation by Rodney Kueffer

Simplicity Variation by Rodney Kueffer

Simplicity Variation by Rodney Kueffer

Simplicity Variation by Rodney Kueffer

Simplicity Variation by Rodney Kueffer
Rodney Kueffer's unique box clock frame surrounds the Simplicity Mechanism.  Beautiful work!

2/15/14

Leonard Cloninger's Simplicity

Simplicity by Leonard Cloninger
Hello Clayton,

Attached are some photos of the Simplicity that I completed. Was fun to build. I tell people that kids played college basketball on that clock. The gears are made from the gym floor from the University of Montana, Missoula. I salvaged the flooring from a renovation back in 2001.

Simplicity by Leonard Cloninger

The large gears have 36, 10 degree pie shaped segments in them and the smaller gears are laminated flooring ply.
Simplicity by Leonard Cloninger

The clock face is also flooring.
Simplicity by Leonard Cloninger

I hope you like my clock and I'll keep you posted on my further projects. Thank you,

Leonard


Wow, Leonard.  That is one deliciously beautiful Simplicity.  You are obviously not a newbie to woodworking and design.  The evidence is clear throughout your wonderful interpretation of the Simplicity.
So excellent to see all of your personalizations, too.  Seeing the clock mounted to your frame design with the Roman numeral dial in its full glory is really cool, and the segmented, solid wood wheels makes it a spectacular art piece.

Well done, Leonard!  That is truly one of the most beautiful Simplicity's that I've seen, and certainly one to be extremely proud of.

Thanks so much for sending the pix of your excellent interpretation of the Simplicity...now if you can just keep the basketball players off of it.  Ha.  You sure picked perfect wood for this - it's all well seasoned hardwood that makes your Simplicity an eventual heirloom that will be handed down through the generations in your family.

So excellent.
Aloha.  Clayton

Note from Clayton:  the large Roman numeral dial for Simplicity is an option that because of its size, is only available in the dxf format of the Simplicity plan.

10/31/13

Simplicity by Keith Lowe

Simplicity by Keith Lowe

Dear Clayton,
 
I’m proud to attach a view of my first ever clock – made to your Simplicity design.
 
Making a wooden wheeled clock has been a longstanding dream. My daughter started me off 3 years ago by buying the plans for my birthday. Having never done anything like it before the learning curve has been pretty enormous – not least in getting together and learning how to use my ‘workshop’. And, probably needless to say, a fair bit of the learning has been done the ‘hard’ way.
 
And the result is a joy – running of 6lbs – which isn’t perfect – but still qualifying for a place in our spare bedroom (beyond the reach of puppy-teeth).
 
I could never have done this without ready worked designs and plans such as yours – so thank you Clayton for many hours of pleasure so far – and may more to come – my wife bought me plans for ‘Nautilus’ for this birthday, and our daughter is patiently waiting for her turn, so there’ll be no lack of projects for a good while yet.
 
Greetings from Sheffield, England
 

Keith

Wow, Keith, I'm impressed!  That being your first clockworks ~ your craftsmanship is spectacular.  Great job on a beautiful build!  Your wood choices really make your Simplicity "Pop!"

I also enjoyed your clock story, and it may seem strange, but I also like hearing that the builder has had to learn certain things the "hard way".  I try to make my plans as simple to follow as possible, but there's always a bit of frustration involved with every build (I try to engineer most of it out...but not all!).  

I have found that the sense of accomplishment perceived at the end of a project is directly proportional to the amount of frustration surmounted during the build.  So congratulations on both counts ~ a beautifully crafted build, and that giant sense of accomplishment you must be feeling right now!  You certainly deserve it.

Your second clock will, of course, be an improvement over your first...after all you've learned a lot, but that first clock will always hold a special place in your heart.  And if you'd like to decrease that drive weight a bit, check out my FAQ's - especially the section on "Depthing".  Or, just leave it alone!!!  It's a beauty and running well, and that makes both of us very happy.

I look forward to seeing your Nautilus pix.

Enjoy!

Aloha.  Clayton  

2/28/13

Simplicity by Karl Noren


Simplicity by Karl Noren

 Dear Clayton, 

I'm a newly retired electronic engineer; my main hobbies are Fishing and Woodwork. I purchased your plans for the Simplicity Clock to fulfil an ambition I had to make a wooden clock movement. Once I retired and had the time available for such pursuits.

I found your plans very well worked out and fairly easy to follow, (after converting your inches to metric) the clock is now finished and hanging on the wall and keeping good time.

I made the big cog wheels using plywood but the rest is made from a local hardwood, Jarrah, (see link) it is my favourite wood and I have made several pieces of furniture over the years. If I get around to making another clock it will be all Jarrah but I can't get Jarrah plywood so I probably have to do my own laminations.


I got the clock to run OK on about 4 lb, I settled for a weight of 5 lb 3 oz, (to give it some reserve power) lead enclosed in a cylinder made from jarrah, I had to reduce the length of the pendulum rod by 2.5" to get it whitin range.

http://www.hardwood.timber.net.au/species/jarrah.htm

Karl Noren
Perth
Western Australia


Aloha Karl, you have created an extremely beautiful Simplicity. I can understand why the Jarrah is one of your favorite woods ~ it's color and depth and overall appearance is spectacular!

I think you have created the first Simplicity Dial Ring that is rotated an additional 15 degrees. It looks wonderful with the inlayed dots and spaced separations. Brilliant!

Your final drive weight is perfect, too. Since the Simplicity is a beginner's clock, my drive weight recommendation is way high. I put it up there because I want every builder, no matter their level of craftsmanship, to be able to hear their clock tick. The drive weight you have attained is a testament to your craftsmanship...as if one couldn't see that throughout the rest of your clock. You've done a truly spectacular job on your first clock(!)

For solid wood wheels or on how to lay up your own ply wheels, check out the "Ron Walters" link in the "Favorite Links" section of my site. He has done some superlative work with solid wood and homemade ply wheels.

Thanks for the beautiful pix and for doing the Simplicity plan so proud.

1/13/12

Simplicity by Barry Coleman


Simplicity by Barry Coleman
Barry emails:  "Hi Clayton.    Barry Coleman here, thank you for plans sent, here are pictures of the finished clock.   It runs on about 7 pounds of brass, losing about 1 minute an hour at the moment, will trim.

This is my first clock, can hear it ticking now, very satisfying.

Regards, Barry"

Clayton answers:  "Congratulations Barry, you did a nice job on your Simplicity. I love to hear these 'first time' stories because I still enjoy hearing about a new clock being put into beat.

Give your Simplicity some time to 'break in'. Some clocks run fast or slow in the beginning. Give it two or three weeks before any major tweaking.

I agree - hearing her ticking is quite satisfying.

Great job on your Simplicity.

Aloha. Clayton"

11/23/11

Simplicity by Steve Stoetzer

Simplicity by Steve Stoetzer
Steve writes:  "Hi Clayton,

Built a Simplicity clock per your plans. Clock runs well, but is several seconds fast/minute. I have tried adding weight to the bottom of the pendulum, but it does not make a significant difference. I was wondering if minimally reducing the diameter of the escape wheel would slow the clock down and wanted your advice in case it would be a move in the wrong direction. Attached are several pics of the clock in case you're interested. It was a very enjoyable project.

Thanks much for your help,
Steve"


Clayton emails:  "Beautiful job, Steve. I especially like your turned weights. Very classy! You did a beautiful job throughout...and that may be part of your problem!

First of all, some mechanisms run fast of slow for the first few weeks. So I always recommend not doing anything for four to six weeks except enjoy the clock's beautiful song and not worry about the accuracy.

After that break in period, if it is still running too fast, you have some choices. The first would be to decrease your drive weight. I actually have the suggested drive weight WAAAYYY too high. The clock should run on about three pounds, but I suggest more because it is a beginners clock and I want everyone - no matter how bad their craftsmanship - to hear their clock run. It's also why I state that the drive weight for each clock will vary.

And this is where your great craftsmanship comes in - maybe because your techniques and accuracy and precision were so good, there's not enough internal friction to be overcome by the excess amount of drive weight - thus making your Simplicity run fast.

If that is not the problem then you'll need to increase the length of your pendulum shaft.

The third treatment you say you have already tried, and that's to add weight to the bob, thus making the apparent center of gravity for the pendulum a bit further away. And also absorbing some of that excess drive weight.

So start with; #1 waiting a while, then #2 reduced the drive weight.

You'll get her purring along just fine and she'll eventually be within a few minutes a day in accuracy.

Congratulations on your fine craftsmanship.

Aloha. Clayton"

10/12/11

Putting Your New Clock into Beat: Serkan Yaliz's Simplicity

Simplicity by Serkan YALIZ

Serkan writes:   "Aloha Clayton,

Hello fron Ankara-Turkey. We had purchased the plans nearly a year ago.
"She" is ticking finally :)

And keeping the time with an error of +1 min per hour. I can tune her up if you have any suggestions.

Looking forward to purchasing new plans from you.   Have a great day.

Serkan YALIZ"

Clayton writes:  "Aloha Serkan, nice to hear back from you.  Thanks for the pix.  It is always nice to see a new clock being put into beat.  They are such wonderful mechanisms, and it looks like yours turned out beautifully.  Your wheels look so clean and crisp!  Nice craftsmanship.

You don't say if she is running fast or slow each hour, but right now it does not matter because during the first four to six weeks it is best just to let them run,and then after that time, after they have 'broken in', make changes.  Some clocks just naturally run fast or slow for a few weeks and then get into their natural beat.

I would guess from seeing your craftsmanship that your clock is running fast.  After the break in period if she is still running fast you can; add more bob weight, lengthen the pendulum shaft, and/or decrease the drive weight.  But a fast running clock is only a testiment to your craftsmanship because it tells me that there is very little internal friction.

If your clock is running still running slowly after six weeks it is a simple matter of shortening the pendulum shaft by 1/2" (12mm) at a time and retest.  Your bob should be in mid position on the threaded rod when you retest.  That way you'll have plenty of adjustment room, up or down, to get your clock into perfect beat. 

Perfect beat for a pendulum clock is about one minute error per day, but remember that will change as the weather changes.

Thanks for the beautiful pictures of your clock that is so happily ticking away over there in Turkey.

Enjoy.

Aloha.  Clayton"

8/16/11

Simplicity by Rick Broby

 Simplicity by Rick Broby
Rick emails: "Hi Clayton,

Well here is my finished Simplicity. I made it for my sister who lives in Canada, I used Cherry and Maple wood and made the bob to look like a Canadian maple leaf. Her cabinets are cherry with stainless appliances so I bought a stainless grab bar from Home Depot (the kind you find in the handicapped bathrooms) I cut it in pieces and used it for the weights.
 
 I also made the corner frame supports a little fancier with some fret work.   (Click picture to enlarge and show detail)  It ended up being a lot more work but she was happy with it and it was fun to make.
 
Well I'm not sure which pattern I will tackle next but thanks for this one.

Rick Broby"

Clayton answers:  "And, you cut fancy hands and scrollsawed all those numbers! Beautiful.

It is easy to see that you are an excellent and accomplished scrollsawer. The beautiful scroll work you did on the supports, hands, bob, and dial really set your clock apart.

Thanks for the pix. Your Simplicity turned out both beautiful, and uniquely your own...and it's always nice to hear your sister appreciated your efforts.

Aloha. Clayton"

8/10/11

Excellent Tutorial Video Series by Ron Walters, Part One

We are proud to share with you some really great videos by Ron Walters in which he demonstrates experiments he conducted  (on his Simplicity clock plans) with segmented, solid wood wheels, homemade ply and contrasts his homemade versions with purchased Baltic birch ply. These videos contain some really great information for the advanced wooden clock builder who wants to make his own solid wood wheels or wheels from homemade ply.

Note from Lisa:  I will be posting these videos in four separate blog entries, but I will be posting all four entries in one day to preserve the sequential order of the tutorials.  Enjoy!


        Simplicity Variant - Homemade Plywood – Introduction


Excellent Tutorial Video Series by Ron Walters, Part Two

Plywood Clamping Jig - Making Plywood Part 1

Plywood Clamping Jig - Making Plywood Part 2

Plywood Clamping Jig - Making Plywood Part 3

Excellent Tutorial Video Series by Ron Walters, Part Three

Segmented Clock Wheel Part 1

Segmented Clock Wheel Part 2

Comparison Of Completed Clock Wheels - Plywood & Segmented Wood

Excellent Tutorial Video Series by Ron Walters, Part Four

Wood Gear and Clock Wheel Repair - Baltic Birch Plywood


Ron Walters emails:  "Also on YouTube is a recent series on Improved ShopVac Performance and a Cyclone Separator made of wood. Easy to make and it works great. I have used one of these on my scroll saw (it picks up sawdust and the pieces cut out of gear/wheel teeth) and for metal cuttings from my small lathe and mill. I have emptied the 5-gallon bucket several times and haven’t touched the bag in that ShopVac in years. You might find it handy in your shop. A ShopVac isn’t much use if the airflow is choked and the 5-gallon bucket is so much easier to empty than the ShopVac (with or without a bag). 

This is also a construction article on http://woodgears.ca .

Thanks!

Ron Walters
Springfield, MO

YouTube videos listed under: ronaldwalters47

Shop Vac Filters - How To Improve Performance
Shop Vac 5 Gallon Cyclone Separator Part 1
Shop Vac 5 Gallon Cyclone Separator Part 2
Shop Vac 5 Gallon Cyclone Separator Part 3
Shop Vac 5 Gallon Cyclone Separator Part 4"

Great job on the tutorials, Ron!  Thank you.

6/24/11

Simplicity by Isaac Reid


Simplicity by Isaac Reid


Isaac writes, "Hello,

I would like to buy your plans for the Marble Strike wooden clock. Here are some pictures of your Simplicity clock that you designed, that I built as a gift for someone. I truly enjoyed this project. I have been working on a couple more clocks since to give away.


Simplicity by Isaac Reid, Detail (Click on pictures to enlarge).


I was looking through your site again about a week ago, and found your Marble Strike clock. I have visited the site everyday since just to look at it. It truly is a masterpiece and the coolest clock I have ever seen.

I realize the Simplicity is your simplest clock design, but I was hoping I would still qualify to buy the Marble Strike plans. Here are a few images of one of the my completed clocks. You can also see a video on Youtube here.

Thank you for designing these incredible clocks.

Sincerely,

Isaac Reid"

Wow, Isaac! truly beautiful job on your Simplicity. Your woodworking skills and craftsmanship are certainly displayed in glorious fashion. I also liked seeing that you used the braided line for the weight cord. That's my favorite too because there's no twisting of the weights that can happen with monofilament.

Yes! The Marble Strike is a magnificent machine. The Marble Strike was a long time in the coming. It's been in R&D, I would estimate, about five years. I would design a little, run into a snag, and put it on the back burner for a while. Then sometime later my Subconscious Committee members (those are my muse, my 'Blind Monkeys', that feed me little bits of ideas) would give me a scintilla of an idea and I'd start designing a bit more. It is so wonderful to see such a nebulous concept being brought to fruition. John and Landon are the two builders that helped so much in making this plan available.

You certainly qualify for membership in the Masochist's Club - an association of elite wooden clock builders, and we welcome you.

The secret path into the Masochist's Corner begins (note: info removed for blog post--Lisa) From the pix you sent of your Simplicity, I know you will do the Marble Strike proud. I hope you enjoy building the Marble Strike as much as I have enjoyed designing it.

Your work is truly beautiful.

Enjoy!  Aloha.  Clayton 

6/13/11

Simplicity by Peter Vennix


Simplicity by Peter Vennix

Peter writes:  "Hello Clayton,

Just a few words to you to tell you that I finished the Simplicity clock.

It’s been a wonderfull time for me, building this clock and discover that I had it in me to make something like this.

Normally I am not much of a woodworker but I am more a greasemonkey, restoring old mopeds and stuff like that.

However I found (old) mechanical clocks always interesting and I have quite a few of them.

And now….I built a beautiful mechanical clock myself and it feels good. I learned a lot doing this and with what I know now, the second one should be more beautiful….Yes I’m planning to build a second Simplicity clock or maybe another of your designs.

This Simplicity Clock is hanging in my livingroom and is running well. It keeps time pretty accurate.

In Europe we have millimeters instead of inches so I had to convert some measurements to millimeters but I pulled it off so it’s no big deal for Europeans to make a clock like this one. Hey,…if I can do it, everyone can.

I send you two pictures of my Simplicity clock and I want to thank you for the drawings and the beautiful design.


Everybody who sees the clock says it’s design is very pretty. And they are astounded when I tell them that I built it myself.

Until next time….. 

Greetings from the Netherlands,

Peter Vennix"


Peter, your friends are right - that is a beautiful Simplicity. And what a nice story! I love hearing how someone without much in the way of woodworking skills is able to create such a beautiful mechanism. A testiment to the simplicity of Simplicity. Most of these mechanisms truly are quite forgiving for the first time builder - as your wonderful Simplicity will attest.

Your Simplicity plans do come with TWO Simplicity design options; the original weight/counterweight design (the one that you built), and the single weight, key wound Variant design, so you always have that additional option now that your skills are finely honed. You are right, your second clock will be much improved over your first attempt, BUT your first hand-built clock will always hold a special place in your heart - and yours really is a beauty. Well done!

Enjoy. Aloha. Clayton

6/9/11

Simplicity Tips: Mystery Dowel, Internal Friction, Wind Cord, etc.

A helpful exchange of emailed information for beginning clockmakers.  My responses are in red.

Hi Clayton,

I've been working on Simplicity for a while and I have a quick question - on page 13, the crutch. I don't understand the "drill 1/4" and glue in 1/4" wood dowel." Can you explain a little further please?

This is my first scroll saw or woodworking project, so it's great to have gotten this far. I have all the pieces cut and sanded to where the line just disappears. I just have to cut the rods and start assembly.

Thanks!

Paul Jozefek

Aloha Paul, you are not the only one. I get a question about that Crutch about two or three times a year.

The 1/4" dowel is simply glued into place cross grain to help prevent splitting of the Crutch when the Allen Screw is screwed in, and to give the Allen Screw some cross grain to 'bite' into.

That dowel helps prevent splitting of the Crutch and stripping of the hole by the Allen Screw.

Be sure to send pix when you get yours completed. I always enjoy seeing the creativity of other woodworkers.


Hi Clayton,


I finally finished Simplicity and I attached pictures. This was my first woodworking project of any kind, so it's pretty basic. I stumbled across your website one day and knew I had to build some of your clocks. I bought a scroll saw, drill press, disc sander, etc, and began to build. I cut one practice wheel, and everything else went directly on the clock.

When I first got it running it stopped every ten or fifteen minutes. There was one tooth that was sticking. I sanded it down and the next try it ran for about 13 hours and stopped. I assume the clock has too much friction somewhere. I did sand a few more teeth, and hopefully that will help some. It's been running all day, for about 11 hours now, so I'll know soon. Are there any common problems that I should be aware of? The good news is that I plan to bring it to my office, so I only need it to run during the day. Unfortunately I work in Manhattan and take the train to work. I'll bring it slowly. The weight shells one day, the pendulum another, and finally the clock. I'll have it packed well, so hopefully they'll be no problems. My company just moved to new offices and we had all the outer office walls made of glass, so everyone will see it.

I bought your Modern Times and Solaris plans, so I'll attempt Modern Times next. Solaris is my favorite of all your clocks, so I can't wait to get that far.

Thanks for creating such amazing designs and plans.

Best Regards,
Paul Jozefek

Great story, Paul, and your Simplicity came out great(!) - especially for a first time woodworking project.

When a clock runs for 13 hours straight, you're there! There's just a little internal friction somewhere. A good way to "break in" a clock is to pull off the pallets and just let it freewheel for a few winds. That should help remove any tiny bits of internal friction that there may be.

You can also lube up your clock wheels a couple of ways; one is to use a Crayon or candle, and just touch it to the pinion while the clock is freewheeling. A little paraffin goes a long way, so don't over do it.

Since there is no finish on your clock, you can also try simply spraying the wheels and pinions with spray silicone. That can temporarily take away a little of the internal friction, too. Had you used a finish, you would want to check to see if the propellant in the spray silicone would damage your finish before using this method.

You could also add just a little more drive weight (or subtract counterweight) and see if that helps.

Modern Times really is a wonderful mechanism. So easy to build, and she is just such a great runner.

Solaris is also my favorite of the two gravity escape clock designs, but the other one, the Model T, is my wife's favorite. Both are really interesting clocks to watch.

Thanks for the wonderful story and the great pix of you Simplicity.

Aloha. Clayton

Hi Clayton,

Thanks for the great tips. Yesterday the clock stopped in the same spot, so I investigated further. It turns out that when I threaded the pulley I got the cord tangled. It would reach that spot and stop. I untangled it and set the clock running before I left this morning. Hopefully it will make it the whole way now.

Thanks again,
Paul

You can do a couple things to correct binding of the wind cord on the wind barrel; one is to gently lift the weight while pulling down on the counterweight. That helps take the tension off of the cord being wrapped around the barrel of the wind pulley as the clock is being rewound.

The second thing you can do is to wax the wind cord. Allow your clock to run down completely and run a paraffin candle or Crayon (of appropriate color) up and down each side of the wind cord a few times to coat the cord. When you have finished, rewind your clock by lifting slightly on the weight and pulling down on the counterweight. The counterweight cord side does not need this treatment.

6/3/11

Simplicity by Ken Schade, and Tips on Getting Your Clock to Run


Ken Schade writes: "Dear Clayton Boyer,

I purchased your "Simplicity" plans a few months ago and after finally getting my wife to let me buy a scroll saw, I have finished the plans as you have them. And let me tell you it was so much fun building it, I can't wait to surprise my wife with it...once I can get it to work right. I was hoping you could give me some advice on where my problem might be. Every time I start my clock, it will run for about 3 minutes before the bob/pendulum stops moving. I have sanded all my gears to 400 grit or better. When I blow on the gears they spin just fine without any sign of binding, but as soon as everything is put together it just doesn't seem to work. I was hoping that you'd be able to tell me where to start my trouble shooting.

Thank you so much for your help and I look forward to purchasing your "Toucan" plans. I love all of your designs and I know my wife will too once I show her your site. Still want to surprise her.

Thank you for you time, Ken Schade"

My reply to Ken: Aloha Ken, you have successfully entered the "Tweaking Stage" of wooden clock making. That's the stage where everything looks like it should run, but doesn't.

You state that you have built the Simplicity as drawn and not made any "improvements" to my design (always the first question I need to ask when a clock doesn't run), and you have read over my FAQ's on Depthing (Congratulations!!! Yay!), so those two biggies are out of the way.

Because she runs for three minutes and stops, it is obvious that the problem you describe is being created by too much internal friction and that friction is not being overcome by the drive weight.

You could try increasing the drive weight a bit, but because Simplicity is a beginner's clock, the amount of drive wieght I recommend in the plans is way more than she should actually take to run anyway (mine runs on just a bit less than three pounds).

Another good place to look for your internal friction is where the crutch pin enters the pendulum shaft. That crutch pin MUST move freely but not be sloppy.

The correct setting between the crutch pin and pendulum is if you can just barely slip the corner of a dollar bill in between the two of them. Any more than that and the impulse will not be transmitted to the pendulum, any less and the friction between the pin and pendulum will not allow the impulse to be transmitted.

You also read in my FAQ's about not getting any finish on the tooth surfaces of the wheels and pinions? Finish takes up space between the teeth, and some finishes never dry and are thus sticky, increasing friction dramatically.

Also, be sure that your frame is glued solidly between the Shelf and Back Frame piece so there is no 'tweaking' of the frame when the drive weight is added. If your wheels run freely without the drive weight, and then don't run freely when the drive weight is added, a weak frame is causing the arbors to bind.

I'm sure after you've checked out those places that your Simplicity will spring to life and begin singing her beautiful song.

And I have to get this sage saying in here somewhere... Someone once said, "The sense of accomplishment you experience when it begins to tick is directly proportional to the amount of frustration you had to overcome to get it there." And that's why there is a Masochist's Corner. Some guys just can't seem to get enough frustration.

Enjoy!

Ken responds: "Thank you once again for all the help you have given me in the construction of your "Simplicity" Clock. I have attached a picture of the clock. I know it's not going to be one to really stand out from anything else you've ever seen. As I've built this out of all Baltic birch plywood. But I have to say, it's not bad considering I don't have any educational history in wood working. Everything I've built I've learned by experience or from youtube videos. I love new challenges and I would have to say this project has been one of my favorites.

Ken Schade"


Simplicity by Ken Schade

Aloha Ken, thanks so much for the picture. I really never get tired of seeing pictures of the mechanisms that other clocksters bring into being. You know how some people in hospital nurseries fawn over babies - some as ugly as dirt? The fawners see something different in those kids than normal people who don't need actually medication.

I'm kidding, of course, but the feeling is the same for me. These are my offspring, and I still get a thrill seeing pictures of new little ones being brought into being. My 'wallet' is absolutely bulging with my 'kids' photos. http://www.flickr.com/photos/lisaboyer/sets/72157622224676987/ Fortunately, yours is not as ugly as dirt. It is actually quite a nice clock that will sing her sweet song to you for decades, and you did a great job building her... I say that without even taking my full complement of medication.

It's always nice to hear that you enjoyed building her and that she taught you some new woodworking techniques.

Your Simplicity looks just like mine, and she will always hold a special place in my heart.

You did her proud. Congratulations.

Clayton

5/19/11

Simplicity by Steve Riley

Simplicity by Steve Riley

Steve writes:  "Ah, finally finished! It was a lot of fun. My first wooden gear clock from plans. I did make one from a kit once when I was a kid. It still runs at my parent’s house more than 30 yrs later.

I got it to run on 3.4 lbs of weight. It’s been running for weeks. I’m attaching a picture, and my latest YouTube video (thanks for the nice comments on my first video where it wasn’t complete yet!). Feel free to use these on your site if you wish. It’s oak and Baltic birch plywood. I used a DeWalt scroll saw. This project required much more precision than anything I’ve ever done before, I tried my best to not only make a working clock, but a thing of beauty. I think it came out pretty good.


I already have the plans for Solaris, let the fun begin again!

Steve Riley
Shingle Springs, CA"

Beautiful job, Steve! Your oak framed Simplicity looks fantastic.  I like the way you combined the Simplicity Variant frame with the Original weight-counterweight mechanism. It really came out looking very nice that way.
With the craftsmanship you put into this clock, I'm sure it will outlast even your first kit clock from 30 years ago. You truly did create a thing of beauty, and she should be filling your home with her beautiful song for many, many decades.  Congratulations!

5/3/11

Clocks Gone Wild

It's always so much fun to see the creative ideas you clockbuilders come up with.  Here's how Alan English customized two of his "Simplicity" clock plans as gifts:
 The John Deere "Simplicity" by Alan English

The State of Texas "Simplicity" by Alan English
Adrian Iredale mentions that this wonderful original design of his was inspired by one of my mechanisms. I am not sure which of my designs inspired Adrian's cuddley, cute Wombat clock, but this thing is so adorable that you simply must take a look at his video.
Really - I can't tell which of my designs inspired him to create this Wombat clock - or was he just making that part up?